Hello fellow duck lover!
Have you been obsessing over adorable duck pictures and duck egg recipes on Pinterest and dreaming about having your own flock? If so, you’re in the right place.
Learning about a new animal can be overwhelming. You must learn all about their nutrition, housing, and care requirements. All this information can feel impossible to learn and make you want to give up on your dreams entirely.
Fear not! As someone who has owned ducks and chickens for nearly six years, I have put together a guide with all my ducky wisdom so that duck newbies don’t have to stress. This post is a complete guide to beginner duckling care.
Not only will you learn the basics, but all my tips, tricks, and duck life hacks.
Choosing a Hatchery
In Person vs Mail-Order Hatcheries
When you go to purchase your first ducklings, you basically have two options – you can drive to a hatchery or have them ship the birds to you in the mail.
Both are quite self-explanatory. Purchasing in-person means you must drive to the hatchery (or feed store as many feed stores and co-ops sell chicks seasonally) and pick the ducklings up yourself. Or you can choose to have a hatchery ship the birds to your local post office.
In my opinion, there’s no “best” choice when it comes to sourcing your ducklings. There are pros and cons to both in-person and mail order pickup. Here’s a quick summary of the pros and cons to both types of hatcheries.
Pros of In-Person Pickup:
- You might be able to inspect the birds before you buy to ensure their health
- Your birds will have a quick and low-stress drive to your home
- You can support local businesses
Tip: To prevent spreading poultry diseases, most hatcheries won’t let you into their bird buildings. However, feed stores and co-ops usually have the chicks on display for everyone to see. If you want to hand-pick your birds or do a visual health check, opt for a feed store.
Cons of In-Person Pickup:
- Local hatcheries might not carry the breed you want
- It takes time and gas to drive to a hatchery
- Depending on your location, you may not have any hatcheries within a reasonable driving distance
Pros of Mail-Ordering:
- You can choose any breed or pedigree you want, as you won’t be limited to your locale
- You can buy high quality birds from well-known professional breeders
- You drive only as far as the nearest post office
Cons of Mail-Ordering:
- The shipping process is very stressful to ducklings
- Hatcheries set mail-order minimums and may charge ‘small order fees’
- Extreme weather and shipping delays can be fatal to ducklings
I’ve bought ducklings from local feed stores and had them shipped cross-country. I’ve had positive experiences with both. I recommend doing your research on what breed and how many ducklings you want and finding the best hatchery for your specific situation.
Choosing A Mail-Order Hatchery
*Note*: I live in the United States, so this advice does not necessarily apply to any other country.
The first thing to consider when you’re choosing a mail-order hatchery is the distance.
Even though modern shipping is fast, you still need to be mindful of the time your ducklings will spend in transit. The shipping process is stressful to ducklings, and you should try to keep it as short as possible.
Generally, you don’t want your birds to be in transit for more than two days. Because of the stored nutrients from their yolks, ducklings can comfortably survive for about 48 hours in shipping containers. Right before baby ducks and chickens hatch, they absorb their yolk into their bodies. The yolk is a concentrated package of essential nutrients that can sustain hatchlings for the first two to three days of life.
But once the shipping time exceeds 48 hours, your birds are more likely to arrive weak, stressed, or dehydrated.
I live in Wisconsin, and I use Metzer Farms hatchery in California. My birds typically have shipped in just under two days. I have never had any chicks arrive dead. I’ve always had alert, healthy birds.
That said, in an ideal world, my ducklings would be shipped a bit quicker. (On that note, I’m super excited that Metzer Farms is opening a new hatchery in Tennessee!)
If I lived somewhere on the east coast, I would not be ordering from California because it simply takes too long to ship live ducklings.
If you live in Hawaii or Alaska, you might have more trouble finding hatcheries that will ship to you due to the distance. Additionally, Hawaii does not allow the importation of any ducks except Muscovy due to concerns over crossbreeding with native Koloa ducks. Hawaii also has strict disease-control procedures in place to prevent importing bird-borne diseases from the mainland.
Finally, mail-order hatcheries will be limited from time to time by avian disease outbreaks and local legislation. If there’s an outbreak in their area or yours, you might not be able to order from them.
The next thing to look for if you’re ordering birds online is their minimum order policy. Most hatcheries set a 10 to 15 bird minimum order size to make sure the birds can huddle together to stay warm. If you want less than 10 ducklings, you’ll need to buy local or pay an extra fee for small orders.
Many hatcheries will allow you to buy less than ten birds, but they’ll charge a “small order fee”. I really like the way that Metzer farms does it. If you order less than 10 birds, they plug some ventilation holes, add insulation to the floor, and include a heat pack to make sure the chicks stay toasty.
Choosing Ducklings
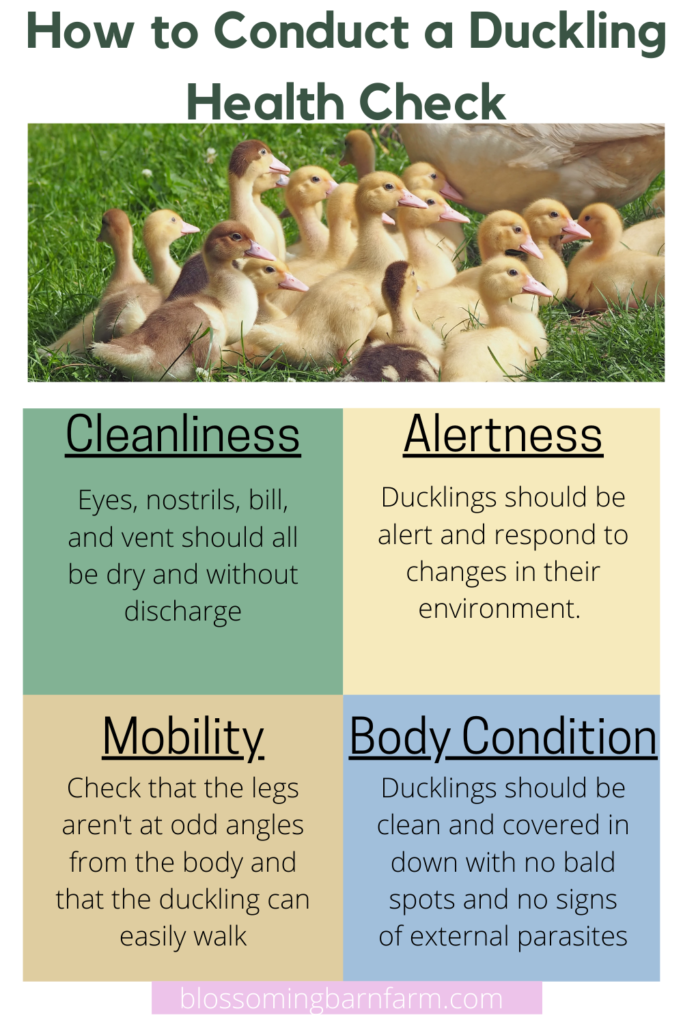
How To Conduct a Duckling Health Check
Perhaps one of the most nerve-wracking things in beginner duckling care is learning their health care. But knowing the basic signs of a sick ducking will go a long way in helping you start a healthy flock.
If you decide to drive to a hatchery to buy your chicks, you might be able to see the birds before you buy them. If so, it is essential to do a health check. I also recommend conducting this health check on mail-order chicks as you’re unpacking them.
The first thing to look for is how alert the ducklings are. Ducklings are generally very high energy and react to any change in their environment. If a duckling is lethargic or doesn’t react when you approach the brooder, it’s a sign that the chick might be sick.
You also need to check the cleanliness of body openings. Always check the ducklings’ eyes, nostrils, bills, and vents. These areas should be clear of any discharge, excess moisture, or staining. Discharge is a symptom of a plethora of poultry diseases.
The next thing to look at is overall body condition. Make sure that the duckling has a body full of clean, downy feathers. Ducklings should not have bald patches or be excessively dirty. Bald patches or dirtiness might mean the duckling is a victim of feather eating, being kept in unsanitary conditions, or is too ill to clean itself.
As you are checking the overall body condition, you should also check for signs of external parasites. Parasites are uncommon in ducks, but they are susceptible to infections of mites, fleas, ticks, and other parasites. In mild cases, ducks will scratch themselves excessively.
If you suspect a duckling is infected, pull aside their feathers and look for parasites by examining the skin under a bright light. Ducks with severe infestations may be lethargic, fail to gain weight, lose weight, become anemic, or die.
The last thing to check for is mobility and leg health. Make sure that all your ducklings can walk and don’t have splayed leg. Splayed leg is a common condition that is caused almost exclusively by slippery footing. The legs of affected ducklings will ‘splay’ out from their body at right angles and prevent them from walking normally. Splayed leg is treatable but only if you catch it within the first few days.
How Many Ducklings
Another question you’ll need to answer is how many ducklings to buy.
Ducks are flock animals and it’s very important that they are not kept alone. Ducks need flocks to socialize and help them feel safe.
In the wild, duck flocks survive by sharing the responsibility of looking for predators and food. Lone ducks will be very stressed without the sense of safety that a flock provides.
Therefore, it’s essential to purchase at least two ducks, though I recommend getting three. When you own three or more ducks, it allows a true flock hierarchy to form. Owning a group of ducks is also insurance against a duck being left alone if it’s flock-mate dies.
Besides social considerations, you’ll also need to think about how many ducks you can comfortably house. When you’re calculating how many ducklings you can get, always base this on the space your adult ducks will have rather than the size of the brooder.
Adult ducks require four to six square feet of space each in their coop. However, if your ducks will be spending lots of time in their coop, you need to give them extra space. If ducks are spending more than one to two daytime hours inside, they should be allowed at least 10 square feet each.
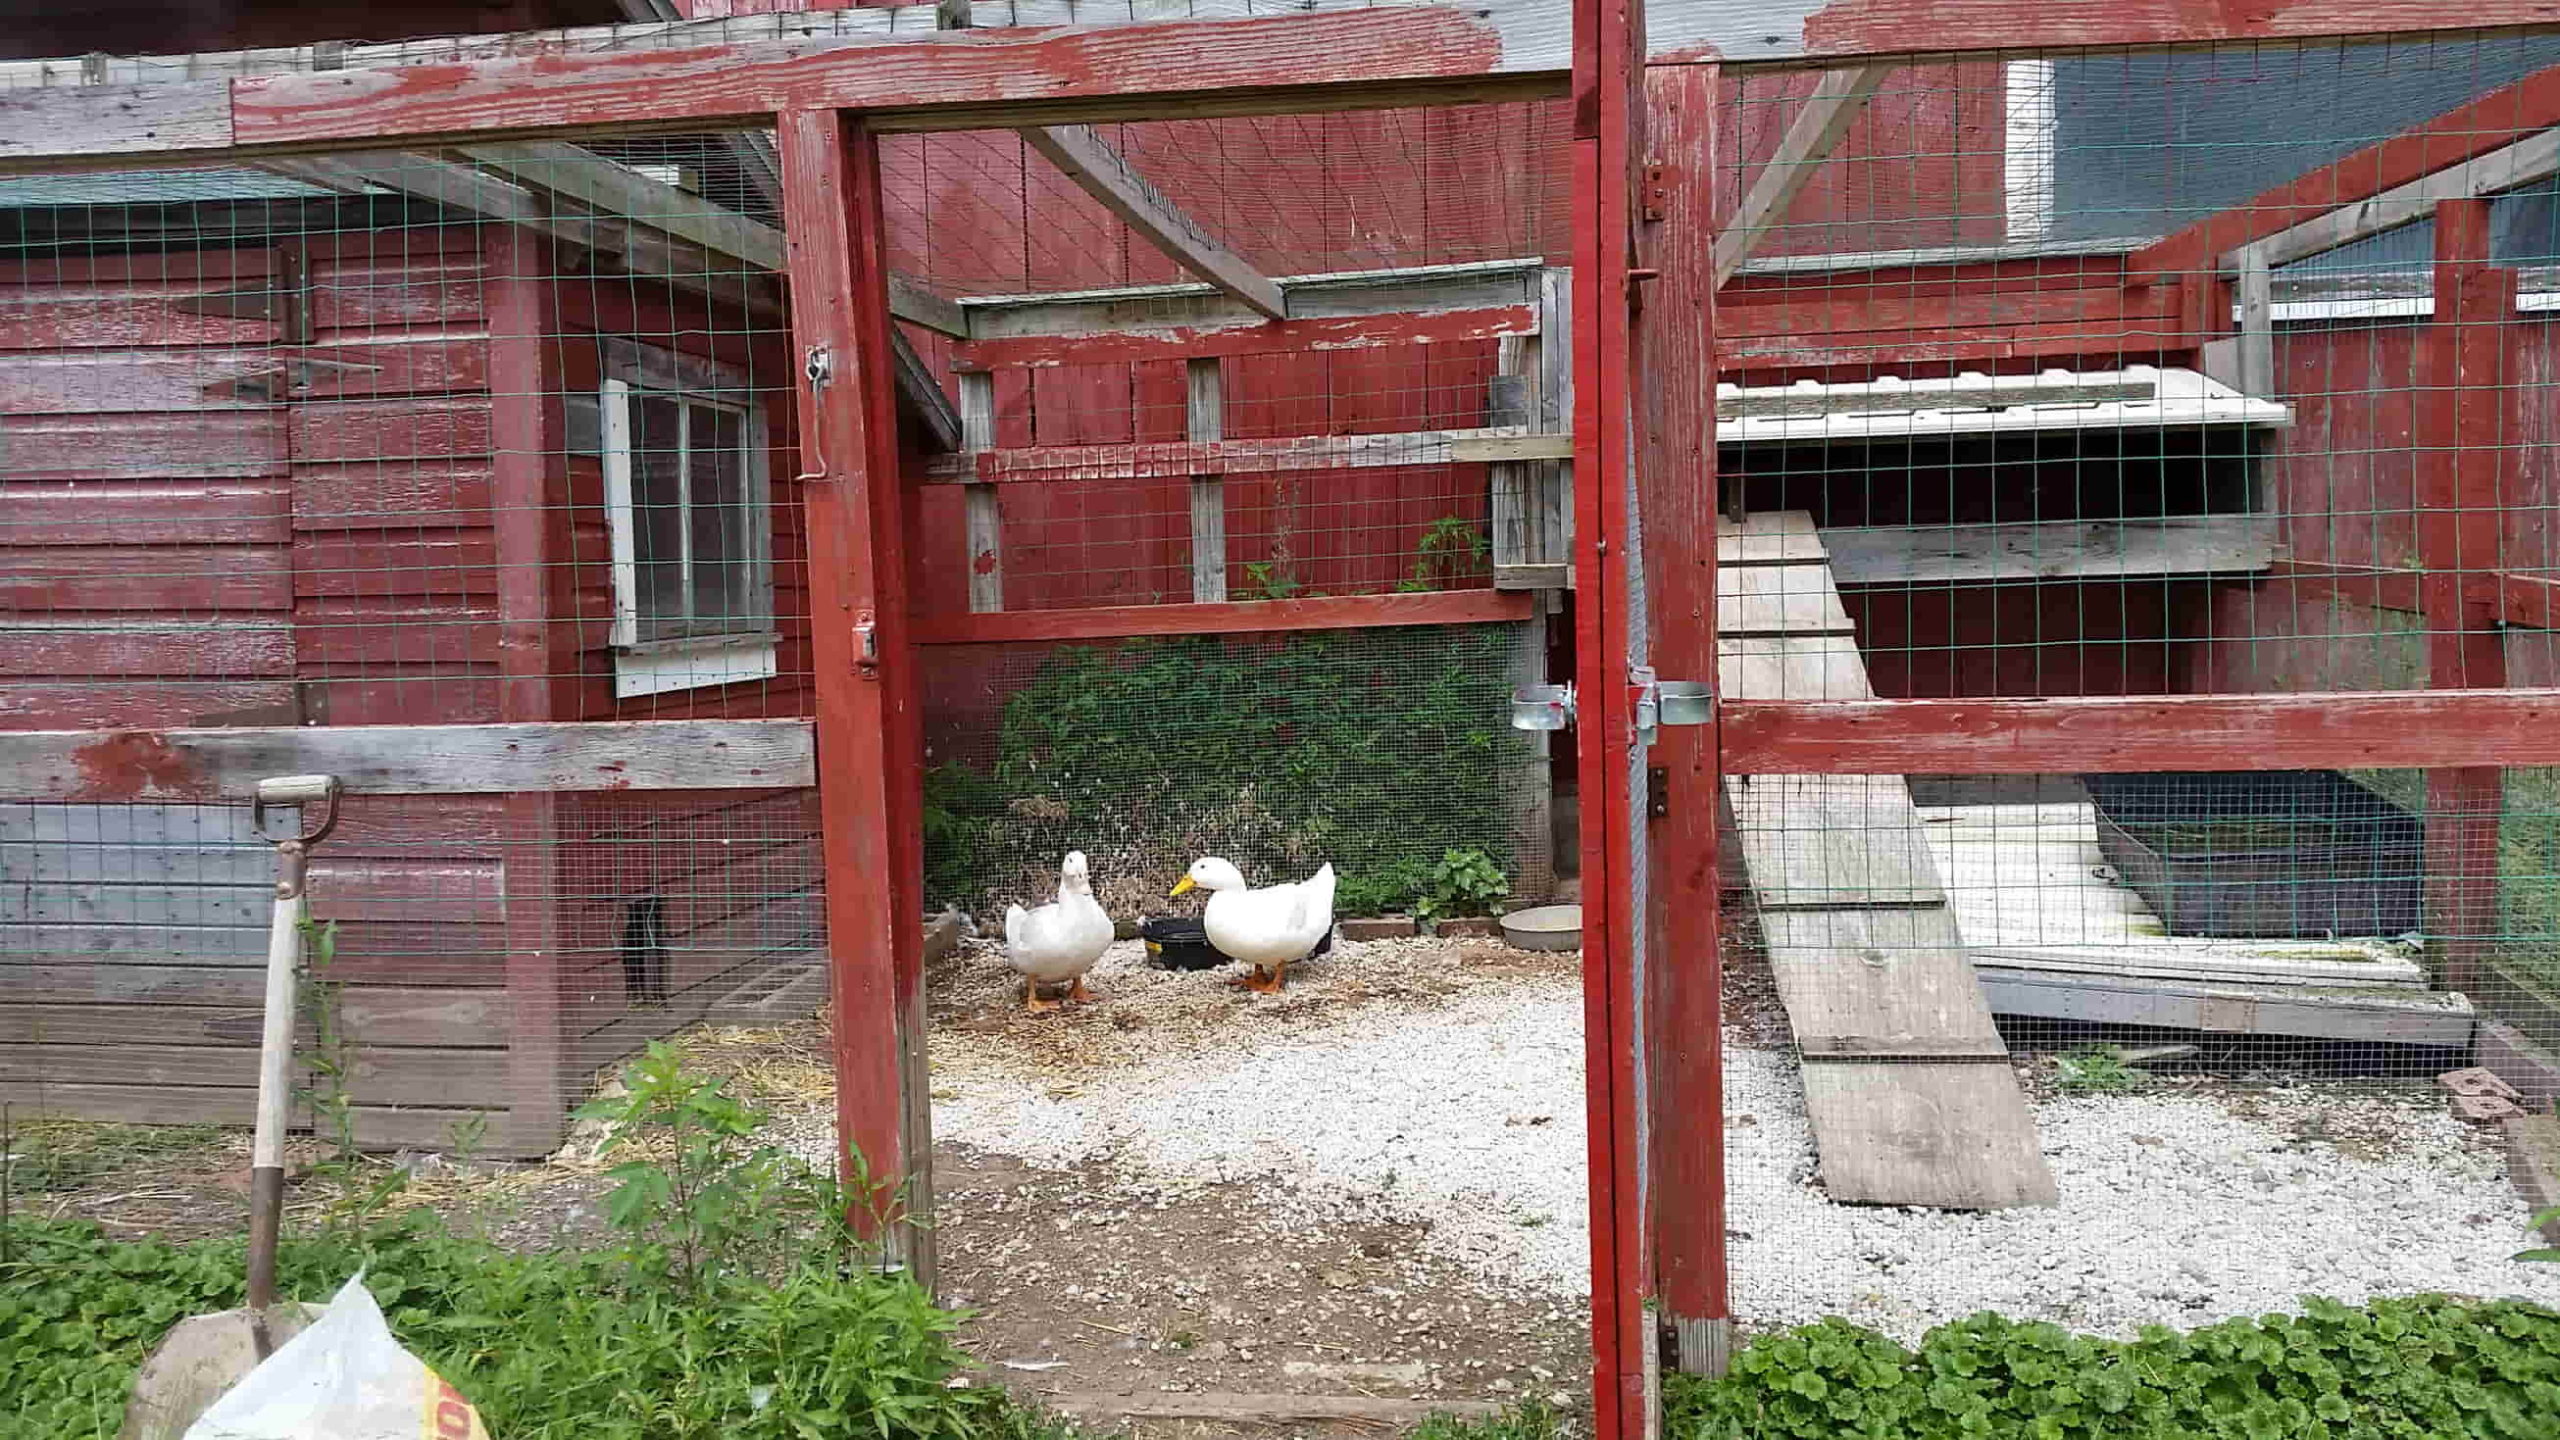
For outdoor space, ducks should have at least 100 square feet of space each… but the more space the better! The larger a ducks’ pen is, the more exercise, mental stimulation, and foraged food they will get.
Lots of people – myself included – let their flock free range. If this is the case, you can make your pen smaller since they’ll have the run of your property during the day.
For example, my duck pen is about 300 square feet which equals about 35 square feet per bird. Despite the size of their pen, my ducks get plenty of exercise and opportunities to forage because they have the run of my barnyard every day.
Preparing the Brooder
Alright now that we’ve covered the duckling selection, let’s get into preparing the brooder.
What is a Brooder?
Simply put, a brooder is a place where you will rear your ducklings.
Brooders are probably the most important part of beginner duckling care – a good brooder will keep ducklings clean, warm, and safe.
Brooders are typically smaller than coops. Brooders can be independent buildings for large number of ducklings, or, more common on homesteads, are set up in stock tanks, large boxes, bathtubs, plastic pools, barn stalls, or a section of a larger coop.
A brooder should be in a secure location away from predators. Brooders should also be free from drafts and out of direct sunlight. Most brooders also feature heat lamps to keep ducklings warm.

Bedding
One of the more boring parts about beginner duck care is buying bedding. Nonetheless, it’s important to create a soft, warm bed for your birds.
Bedding for ducklings should be wood shavings or straw. Most other bedding materials are either slippery, unabsorbent, or bare a close resemblance to food which creates a choking hazard.
In the first weeks of life, ducklings are learning what is food and what isn’t. So, it’s important to use bedding that doesn’t resemble their food.
For adult ducks, I sometimes use compressed bedding pellets that expand with liquid. But I would never use pellets for young ducklings because they can easily mistake them for food. On that note, I also recommend buying shavings that are significantly larger than the duckling’s food crumbles. Fine shavings can easily be confused with food.
Duckling bedding should be absorbent, warm, and non-slip. Thus, something like newspaper would not do the trick because of its absorbency and slip. Using slippery bedding is a big mistake… click here to learn about more mistakes to avoid.
Temperature
For the first several weeks of life, ducklings do not have warm, waterproof feathers like adults and can’t regulate their body temperature. Therefore, we duckling owners need to provide an artificial heat source.
The temperature requirements of ducklings change as they age.
In the first two days of their lives, ducklings should be in a brooder kept at 95 degrees Fahrenheit. Then, for days 3 to 7, keep the brooder at 90 degrees.
Following the first week, the brooder temperature can be reduced by 5 to 7 degrees Fahrenheit each week. For example, in week two you would be at 85 degrees, week three 80, week four 75, and so on. The temperature should be lowered weekly until the ducklings are either fully feathered or the ambient temperature in their environment is equal to the brooder temperature.

You should also monitor the comfort level of your birds based on their behavior. Cold ducklings will huddle together in a pile directly under the heat lamp. Conversely, overheated ducklings will spend time as far away as possible from the heat lamp and might pant.
You can raise the temperature by lowering your heat lamp, adding a hot water bottle, adding extra bedding, or covering part of the brooder to reduce heat loss.
To lower the temperature, you can raise or turn off the heat lamp or increase brooder ventilation.
Caution! Heat Lamp Safety
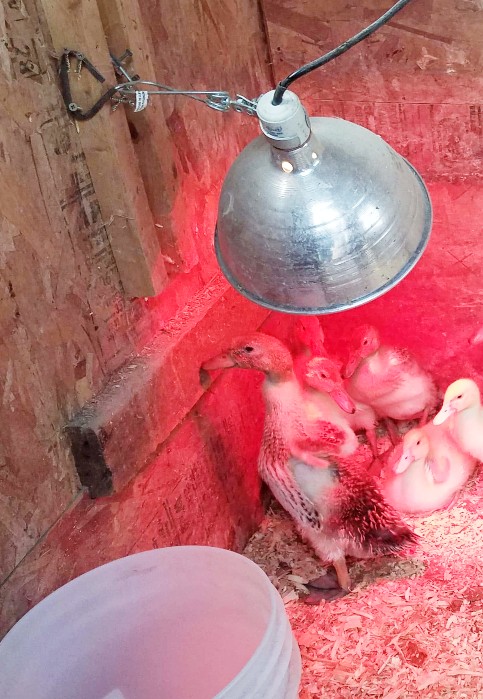
Heat lamps are extremely dangerous and cause dozens of coop, home, garage, and barn fires every year. Heat lamp bulbs get very hot and can easily ignite flammable objects.
If you use a heat lamp, make, triple sure that it is firmly secured to your brooder or wall. Do not trust the attached clamps to hold the heat lamp in place.
Eventually, the clamps will slip or break and cause a fire.
Additionally, don’t install a heat lamp lower than 18 inches from the bottom of a brooder. Ducklings should never be able to touch the bulb.
Don’t use a heat lamp more than absolutely necessary. Heat lamps are not necessary for adult ducks in the winter.
This article has lots of valuable heat lamp safety information.
Brooder Size
It’s important to allow your ducklings plenty of space to prevent overcrowding. Overcrowded brooders can create unsanitary conditions, allow ducklings to easily overheat, and can lead to feather eating.
Ducklings that are under two weeks old need about 3/4 of a square foot of space each. For example, eight ducklings would need a brooder with 6 square feet of space.
When they are between two and four weeks old, ducklings will need about two square feet of space each.
Then, up until they’re six weeks old they’ll need just under 3 square feet of space apiece.
After six weeks of age, ducklings’ space requirements are almost identical to those of adult ducks at three to five square feet of space each.
Like adult ducks, the space requirements of ducklings can vary by breed. Bantam or Small breeds like Call and Mallard ducklings will require far less space than Heavy breeds like Pekins. If you have small-breed ducklings, you can halve the abovementioned space requirements.
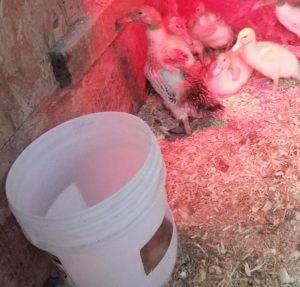
The Right Kind of Water Feeder for Ducklings
When it comes to providing water for ducklings, there are three factors to keep in mind: water volume, water depth, and “swimmability” (yes, this is a word I just made up 😊)
Water Depth: Ducklings, just like adult ducks, need water that’s at least as deep as their bills. Ducks use water to wash out their nostrils multiple times a day. (Read more on the importance of water depth here).
For the first week or two, you’ll probably be able to get away with using a chicken waterer because the ½ inch depth is sufficient for tiny hatchlings’ bills. However, once ducklings get older and their bills longer, you’ll need to provide them with deeper water sources.
Water Volume:
The most obvious requirement of waterers is that they can hold enough water to keep your ducks hydrated. The size of waterer you need will depend on the number of birds you have, their age, and how often you refill them.
Swimmability:
Ducks love to swim. And that’s great, except that it means they’ll try to swim in water that they’re meant to drink. To prevent them from dirtying their drinking water, use waterers that ducklings can’t climb into.
Young ducklings can quickly become chilled, exhausted, or drown in water.
Some great ideas for duckling waterers are food containers with holes cut in the lids or 5-gallon pales with holes in the sides
Purchasing Feed
Feeding ducklings is usually simple. Most commercial chick rations will provide the necessary nutrients for ducklings. Occasionally, ducklings will become deficient in Niacin (Vitamin B3), but this can easily be solved with a few treats of peas or adding nutritional yeast to their feed. (Learn more about niacin deficiency here)
I highly recommend the DuMore brand poultry feed that Tractor Supply Company sells. In the fice years that I’ve used this feed, I’ve never had a duckling become niacin deficient. DuMore feed contains a niacin supplement in addition to yeast and high-quality protein.
Start your ducklings out with a starter/grower feed with approximately 18 to 20% protein content. You can buy a chick feed, all flock starter, or specialized duck feed. If you aren’t using a duck-specific feed, it’s wise to check the ingredients list and nutritional analysis to find out if you need to supplement niacin. Once your ducklings are six weeks old, they can be transitioned to a maintenance feed with 16 to 18% protein.
Ducklings should be fed free choice – that is, they should always have free access to their food.
Ducklings grow insanely fast, so it’s critical that they can consume enough calories to support their growth. Choose a duckling feeder that has large enough openings for their bills to fit into but doesn’t allow them to crawl in it. Ducklings can and will crawl into their feeders and poop in it.
Introducing Ducklings to the Brooder
Duckling Health Check
Once you get your ducklings home, you should conduct a quick duckling health check as you move them to their brooder. Click here to scroll up to the duckling health check.
Bill Dunking
After you conduct the health check, the next step is to dunk each ducklings’ bill into the waterer. This will ensure that the ducklings are aware of where the water is and it will also encourage them to drink. Some ducklings don’t have the instinct to drink right away when they’re born, and bill dunking can help kickstart that instinct.
Tip: If you notice that your ducklings aren’t drinking, you can add shiny objects like marbles or coins to their waterer to attract them. Just make sure they can’t swallow these items. You can also add leafy green treats like dandelion leaves or spinach to entice them.
Down Time
Once your fluffy quackers are settled into their brooder, let them relax for a day or two.
Ducklings are adorable. And I know it’s tempting to pick up and pet your ducklings right away, but your ducklings will be stressed and tired after moving into their new home. They might also be a bit scared of their new surroundings, so you should give them time to settle in and rest.
I usually give my ducklings about two days to settle in before I start handling them.
However, while your ducklings are settling in, you can still spend time with them by observing them and talking to them. If you are raising your ducklings as pets, letting them get used to your shape, smell, and voice will be essential for bonding in the future.
Daily Care
Cleaning
Cleaning a duckling brooder is a little bit different than cleaning coops for adult birds. Duckling brooders are dirtier than coops because ducklings eat, drink, and spend all their time inside.
While you can use the deep litter method for ducklings, you’ll need to deep clean it more frequently due to the extra mess. If you’re not sure what the deep litter method is, check out my article here.
If you choose to use the deep litter method for ducklings, I recommend cleaning it at least weekly to prevent too much moisture from building up.![]()
![]()
![]()
![]()
![]()
![]()
Another great way to keep brooders clean is to spot clean. Using this method, you clean dirty areas as needed and strip the entire brooder about once a week. This method is simple. Any time you notice a particularly wet or dirty spot, you replace the shavings only in that spot.
Spot cleaning lets you take advantage of the fact that brooders will always be dirtier where the ducklings eat, drink, and sleep. This way, you get to keep using clean bedding in low-traffic areas while still cleaning up the messy spots.
Feeding
Instead of boring you with feeding requirements again, I want to talk about how to feed your ducklings. Click here to see nutrition requirements.
Perhaps one of the unexpected parts of duckling care for beginners is the need to add water to their food.
You should add water to ducklings’ food for the first three weeks of life. When ducks eat, they mix their food with water to help the food slide easily down their throats. But, ducklings don’t know to do that right away, so we need to do it for them.
For the first week, the feed mix should be quite soupy. Add enough water to their starter crumbles until it’s the consistency of thin oatmeal or pudding. In ducklings’ second week, their food should be a little drier – think mushy peas or thick oatmeal. And then for the third week, add just enough water to hydrate it so that it isn’t dry and dusty.
Soaked food will spoil more quickly than dry food, so make sure to throw away uneaten food before refilling the bowl.
Watering
Just like with feeding, make sure that your ducklings have constant access to clean, fresh water. Ducklings need to stay hydrated and be able to dunk their bills and clean their nostrils. Click here for duckling waterer ideas!
If your ducklings are stressed, it can be good to use an electrolyte powder in their water like this one. But make sure you also offer fresh water in addition to the electrolyte water.
Pro Tip: times of stress for ducks include severe heat, traveling (like postal delivery), being in a new environment, injuries, illness, and the death of flock mates.
Caring For Ducklings as They Age
Temperature Changes
Click here to see the temperature requirements for ducklings as they age.
Make sure to keep up with temperature requirements as your ducklings age. And keep in mind that the ambient temperature around their brooder will impact how many heating strategies you’ll need to utilize.
Introducing Ducklings to Swimming
One of the objectively best parts about duckling care is watching them swim. And it’s easy to see why – swimming ducklings are ADORABLE.
But there are a few things you need to know to keep your fuzzy quackers safe in the water.

Like I briefly mentioned when I was talking about watering containers, ducklings can very easily get exhausted, chilled, and drown in water.
Ducks are fully feathered when they’re five or six weeks old. Prior to that age, they should always be supervised during swimming.
However, you can let your ducklings start swimming as young as three days old with supervision. Swimming water for ducklings younger than two weeks should be very shallow. Young ducklings should always be able to easily stand up in their swimming water.
Some great things to use for duckling swimming are unused paint trays or cake pans.
To keep your ducklings comfortable, the water should be warm, but not hot enough to scald or overheat the ducklings. 80 – 90-degree Fahrenheit water is a good starting place.
Also, make sure to keep an eye on your ducklings as they swim. Take the ducklings out of the water if they start to look tired, cold, or generally look like they’ve stopped having fun. Wet ducklings should be towel-dried and returned to their warm brooder (Or held in your lap to warm up 😉).
Once your ducklings are a couple of weeks old, you can gradually start to lengthen swimming sessions and give them deeper water.
If swimming water is deeper than what ducklings can stand in, make it easy for the ducklings to get out of the water and rest when they need to. You can do this by having a ‘shallow’ and ‘deep’ side or by adding blocks in the water for ducklings to sit on.
And then once they’re about four to six weeks old, your ducklings can start to be given free access to a swimming pool or pond. Just make sure that your chosen pool is easy for ducks to climb in and out of.
Because they lack adults’ feathers, ducklings have trouble staying warm while swimming. But once ducks are fully feathered, they can comfortably swim and bathe in water all the way down to freezing temperatures.
Introducing Ducklings to Adult Birds
If you’re reading this article, you probably don’t have adult ducks yet. But let me tell you – ducks are addictive. Before you know it, you’ll have all sorts of ducks of all ages.
So to prepare you for the future, let me walk you through how to introduce ducklings to your adult flock.
Introducing poultry to each other is kind of like introducing cats. You want to start with short intervals of time ideally with a physical barrier between the ducklings and adult ducks.
When I start integrating new ducklings into my adult flock, I set up a playpen in the barnyard and let the two groups see, smell, and hear each other. With supervision, these sessions can last for two or three hours.
After a few segregated visits, I start letting all the birds interact freely. The first couple of times you do this should be carefully supervised. Adult ducks can become aggressive to unknown ducklings.
Once it’s time for your ducklings to move into the adult duck coop, I recommend using a temporary fence to divide the coop and/or run into duck and duckling sides. This way, the birds are together 24/7, without the risk of your older ducks injuring your ducklings.
Generally, after living synchronously like this for about two weeks, your flocks will be ready to live together.
Never fully incorporate adult and young ducklings before the ducklings are fully feathered. Before this age, the ducklings will be significantly smaller than the adults and will be at extreme risk of serious injury or death if any squabbles erupt within the flock.
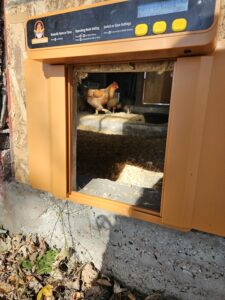
Coop Training
As your ducklings start to approach the age where they’re ready to move into their coop, it’s also time to start thinking about coop training
The concept of coop training ducks is simple – you just teach them to recognize their coop as ‘home base’ and go there at night.
The main step to coop training is “lock down”. For a couple of weeks, your ducks or ducklings should spend all their time in their coop (or run if one is attached to the coop).
Lockdown will create a strong association in their minds that the coop equals home and they will generally stay near the coop when they are allowed to free-range.
Your ducks will consider the coop a safe place and start heading there at night or when they feel threatened.
For some people, the “lock down” step is as far as they need to take coop training. However, if you want to fine-tune coop training, keep reading.
When you start free-ranging your ducks, let them out a couple of hours before dusk. With this timing, they won’t have much time to wander far from the coop and you’ll be able to take advantage of their instinct to shelter at night. Once the sun sets, you can safely herd your ducks into their coop to reinforce their natural instincts.
As time goes on, you can let your ducks out earlier in the day. And, after a few weeks of this routine, your ducks will almost automatically put themselves to bed at night. With my flock, it’s as simple as raising my arms behind them to get them to herd them in.
Something fun to experiment with is using vocal training to call your ducks inside. Click here to see an example from one of my favorite YouTubers!
One of the cutest things I’ve seen my young ducks do is run into their coop the first time they see a plane or helicopter in the sky. It’s hilarious to watch them try to figure out if the strange air beast is scary or not.
There you have it – the basics of duckling care for beginners. Now get out there and raise some ducklings!
Happy homesteading!